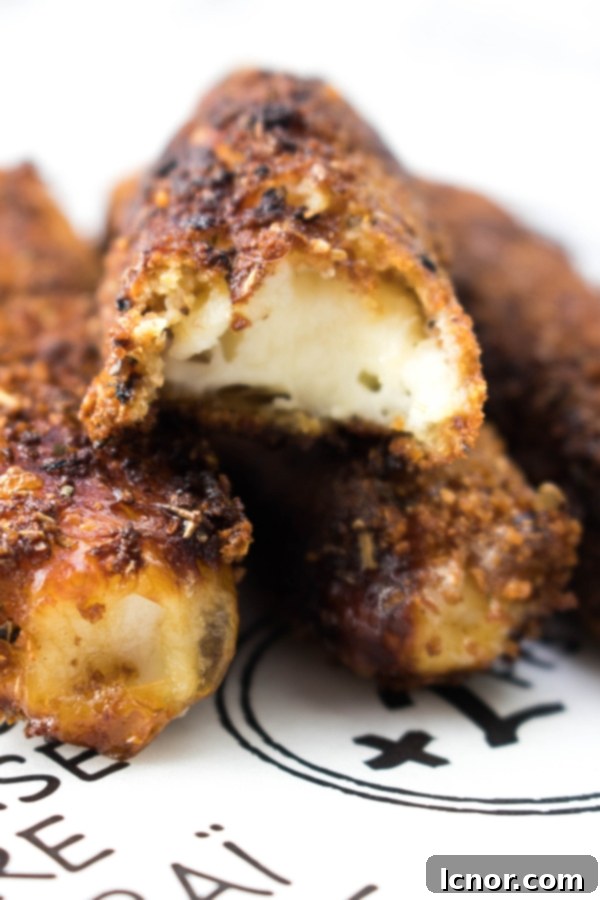
Crispy, Golden Perfection: The Ultimate Homemade Halloumi Fries Recipe
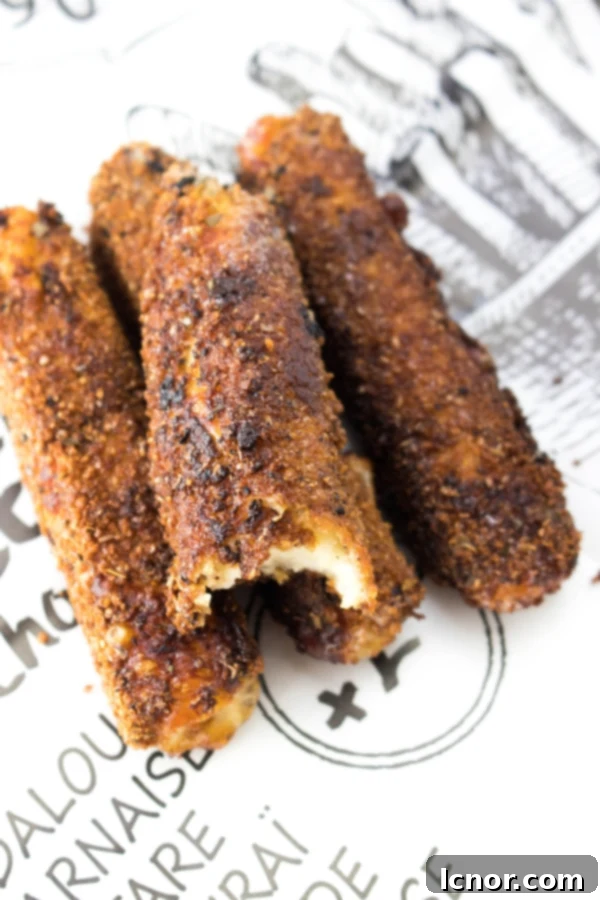
Are you ready to elevate your snack game with an appetizer that’s both incredibly easy to make and utterly irresistible? Look no further than halloumi fries! These homemade halloumi sticks are a culinary revelation, offering a delightful crunch on the outside and a uniquely satisfying, salty chew on the inside. Perfect for sharing (though you might not want to!), they make a fantastic starter, a party snack, or a surprisingly versatile side dish. All you need are a few simple ingredients: halloumi cheese, breadcrumbs for that essential crisp, aromatic Za’atar spice, eggs for binding, and quality olive oil for frying to golden perfection. Trust us when we say, you’ll want to double this recipe – these crispy cheese sticks disappear fast! Serve them alongside creamy homemade hummus and savory oven-baked chicken kabobs for a complete and memorable meal.
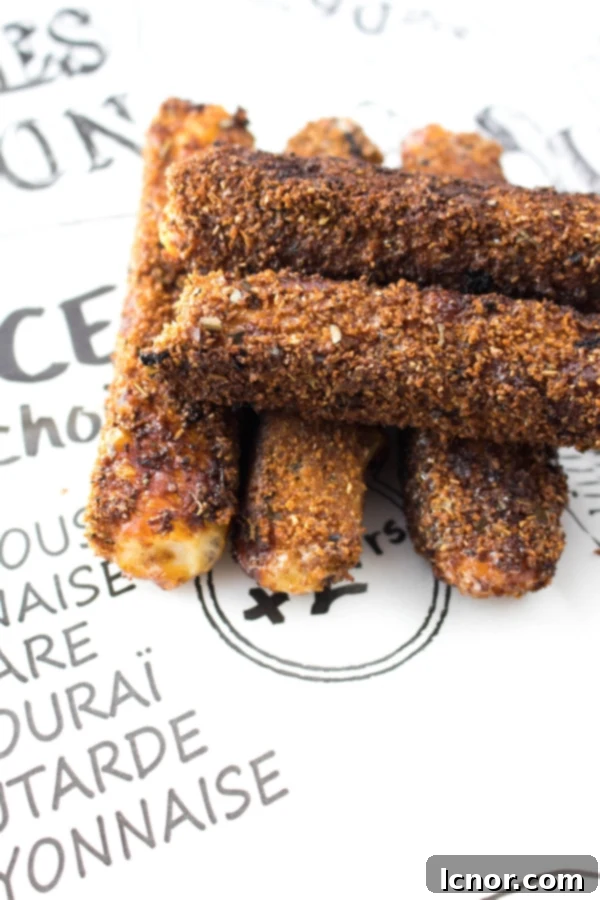
Table of Contents
Toggle
What Exactly Are Halloumi Fries?
Halloumi fries are a savory treat made from Halloumi, a firm, brined, semi-hard cheese traditionally made from a mixture of goat’s and sheep’s milk, and sometimes cow’s milk. Originating from Cyprus, Halloumi cheese is renowned for its unique characteristic: it doesn’t melt when heated, allowing it to be grilled, fried, or baked while maintaining its shape. When prepared as “fries” or “sticks,” the cheese is cut into rectangular pieces, often coated in a flavorful breading, and then pan-fried or deep-fried until golden brown and crispy. The result is a delightfully squeaky, salty, and utterly addictive finger food that has captured hearts around the globe. It offers a distinct texture—a crisp exterior giving way to a warm, soft, and slightly chewy interior, making it a perfect alternative to traditional potato fries.
Why Make Homemade Halloumi Fries?
While you can find pre-made versions, crafting homemade halloumi fries is an experience that truly pays off. The primary advantage is the unparalleled freshness and flavor. You control the quality of ingredients, from the specific type of halloumi to the blend of spices in your breading. This recipe emphasizes simple, wholesome components, ensuring a delicious result free from unnecessary additives. Furthermore, making them yourself allows for customization; you can adjust the seasonings to your preference, making each batch uniquely yours. It’s also often more cost-effective than buying them out, and there’s a genuine satisfaction that comes from preparing such a popular and tasty dish from scratch.
Essential Ingredients for Perfect Halloumi Fries
This recipe uses a straightforward list of ingredients, each playing a crucial role in achieving those perfect crispy, flavorful halloumi fries:
- Halloumi Cheese: The star of the show. Choose a good quality, firm block of halloumi. Its unique non-melting property is what makes these “fries” possible.
- Breadcrumbs: These provide the desired crispy coating. Panko breadcrumbs are excellent for extra crunch, but regular breadcrumbs work just as well. For a gluten-free option, you can use gluten-free breadcrumbs or almond flour.
- Za’atar: This aromatic Middle Eastern spice blend is a game-changer. It typically consists of dried thyme, oregano, marjoram, sumac, and toasted sesame seeds. It adds a wonderfully savory, earthy, and tangy flavor that complements the salty halloumi beautifully. If you don’t have Za’atar, a mix of dried oregano, a pinch of sumac, and a few sesame seeds can be a good substitute, or simply use your favorite herb blend like Italian seasoning, paprika, or even chili flakes for a kick.
- Egg: Acts as the binder, helping the breadcrumbs adhere firmly to the halloumi sticks.
- Olive Oil (for frying): A good quality olive oil imparts a subtle flavor and helps achieve that golden-brown crust. You’ll need enough to cover the bottom of your pan and ensure even frying, but not so much that the fries are fully submerged, as we’ll be pan-frying for a lighter result.
How to Make Halloumi Fries: A Step-by-Step Guide
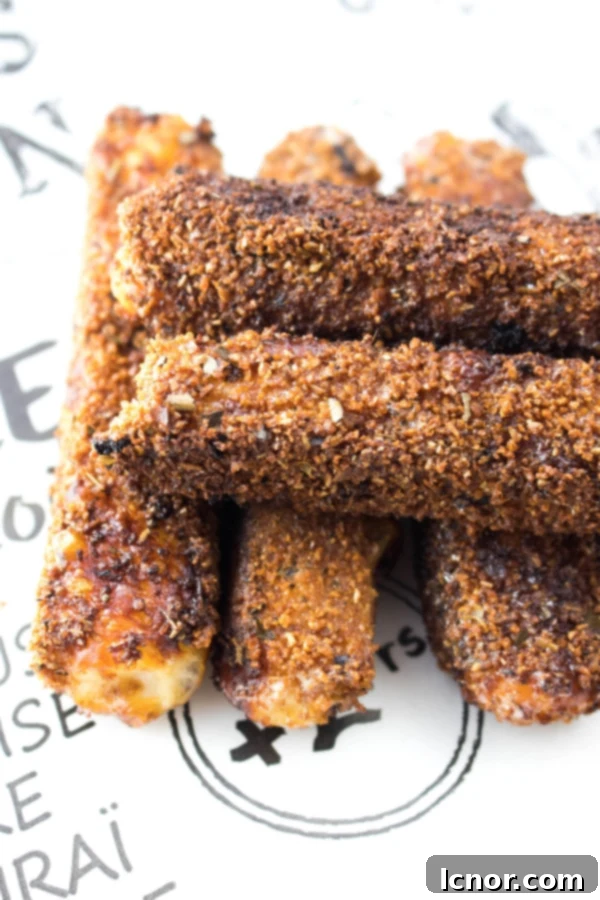
Making these delicious halloumi fries is surprisingly simple and quick. The key to their crispy texture lies in the double-breading technique, ensuring every bite is golden and satisfying. Here’s a detailed breakdown:
- Step 1 – Prepare the Halloumi: Begin by cutting the block of halloumi cheese into uniform fries or rectangular sticks. Aim for pieces that are about 1/2 inch thick and 2-3 inches long. Consistency in size will ensure they cook evenly.
- Step 2 – Create the Seasoned Breading: In a shallow dish or plate, thoroughly mix the breadcrumbs with the Za’atar spice. Ensure the Za’atar is evenly distributed throughout the breadcrumbs for maximum flavor.
- Step 3 – Set Up for Frying: Pour enough olive oil into a small to medium-sized frying pan (a 6-inch or 20cm pan is ideal for small batches) to cover the halloumi fries about halfway. You want to pan-fry, not deep-fry, so avoid submerging them completely. Heat the oil over medium heat until it shimmers, but not smoking.
- Step 4 – First Egg Dip: In another shallow dish, lightly whisk the eggs. Dip each halloumi fry into the beaten egg, ensuring it’s fully coated. Let any excess egg drip off.
- Step 5 – First Breading: Immediately transfer the egg-dipped halloumi stick into the breadcrumb and Za’atar mixture. Roll it around, gently pressing to ensure the breadcrumbs adhere well to all sides.
- Step 6 – Second Egg Dip: For an extra crispy coating, dip the breaded halloumi stick back into the beaten egg. This second layer of egg acts as an additional adhesive for more breadcrumbs.
- Step 7 – Second Breading: Return the egg-dipped stick to the breadcrumb and Za’atar mixture for a second coating. This double-breading is crucial for that ultimate crunch!
- Step 8 – Fry to Golden Perfection: Carefully place the double-breaded halloumi sticks into the preheated olive oil. Do not overcrowd the pan; fry them in batches if necessary to maintain oil temperature and ensure even browning. Fry for approximately 30 seconds on each side, turning gently with tongs, until they are beautifully golden brown and crispy all over. The total frying time per batch will be about 2 minutes.
- Step 9 – Drain and Serve: Once cooked, remove the halloumi fries from the pan and place them on a plate lined with paper towels to absorb any excess oil. Serve immediately while hot and crispy!
Can You Really Fry Halloumi Cheese? The Science Behind It
Absolutely, you can fry halloumi, and it’s one of the best ways to enjoy this unique cheese! Unlike most other cheeses that simply melt into a liquid puddle when heated, halloumi holds its shape beautifully. This special property is due to its high melting point, a result of its unique production process involving curd formation and brining. You can fry it breaded, as in this homemade halloumi fries recipe, to achieve a crispy exterior, or simply pan-fry slices on their own for a slightly softer, still squeaky texture. This versatility makes it a favorite for many culinary applications, from appetizers to main dishes.
How to Fry Halloumi Cheese Without Melting (Yes, It’s Possible!)
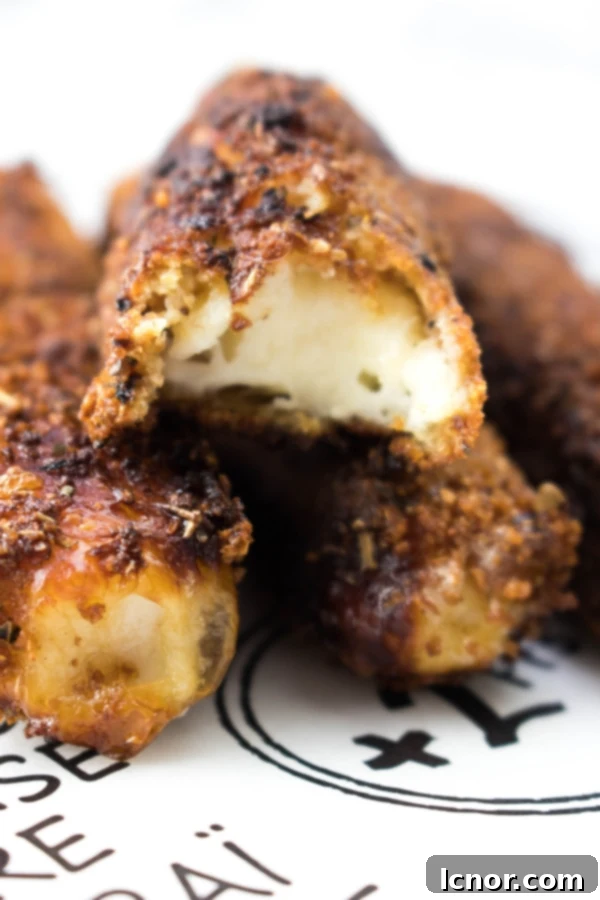
A common concern we often hear, especially after sharing this recipe on platforms like Instagram, is about halloumi cheese melting during frying. The good news is, you absolutely don’t need to worry about that with halloumi! Its unique structure and composition mean it naturally maintains its firm, compact shape even when exposed to high heat. This “non-melting” characteristic is precisely what makes it ideal for frying, grilling, and baking. When you buy halloumi, you’ll notice its distinct firm and somewhat rubbery texture. This resistance to melting is why it’s famously used on the barbecue in many Mediterranean cultures—it won’t drip through the grates. The key is simply to cook it until it’s golden brown and delicious, not until it liquefies.
Pan Frying vs. Deep Frying: Our Preferred Method
While you could deep-fry halloumi, pan-frying is our recommended method for these halloumi fries, and it truly couldn’t be easier! Using a classic frying pan (like the 6-inch/20cm one we used) allows you to achieve a beautiful, crispy crust with less oil compared to deep-frying. For pan-frying, you only need enough olive oil to cover the halloumi cheese sticks about halfway. This method results in halloumi fries that are wonderfully golden and crunchy on the outside, yet still soft and “squeaky” on the inside, without being overly greasy. Pan-fried halloumi sticks tend to be a bit lighter and more approachable than their deep-fried counterparts, letting the natural flavor of the cheese and Za’atar shine through.
How Long Do Halloumi Fries Take to Cook?
The beauty of halloumi fries is how quickly they cook! For this pan-fried recipe, you will need to fry each side of the halloumi stick for approximately 30 seconds. This means each halloumi fry will be perfectly cooked and golden in about 2 minutes total. The quick cooking time ensures the exterior is wonderfully crisp while the interior remains tender. Keep an eye on them, as cooking times can vary slightly depending on your stove and the exact temperature of your oil. They’re ready when they have a rich, golden-brown crust.
The Best Way to Fry Halloumi for Optimal Flavor and Texture
As explained above, we unequivocally recommend pan-frying your halloumi for the best results, especially when making these breaded fries. Pan-frying offers superior control over the cooking process and results in a lighter, less oily product compared to deep-frying. It allows the breading to crisp up beautifully and the halloumi inside to warm through and soften slightly, without becoming overly saturated with oil. While deep-frying can also yield crispy results, the pan-frying method is simpler for home cooks, requires less oil, and delivers a perfectly balanced texture that highlights the unique qualities of halloumi cheese. For a different, less traditional approach, you could also consider air frying for a super crispy, oil-minimized version, or baking for a softer, more evenly cooked result without the intense crust.
Delicious Variations and Serving Suggestions
Customizing Your Halloumi Fries
This recipe provides a fantastic base, but don’t hesitate to get creative with your halloumi fries:
- Spice It Up: Beyond Za’atar, consider adding garlic powder, onion powder, smoked paprika, a pinch of cayenne pepper, or even dried mint to your breadcrumb mixture for different flavor profiles.
- Gluten-Free Options: For those with dietary restrictions, simply substitute regular breadcrumbs with your favorite gluten-free breadcrumbs. Almond flour or a mix of almond flour and nutritional yeast can also work beautifully for a low-carb, keto-friendly alternative.
- Air Fryer Halloumi Fries: For a healthier, less oily version, you can air-fry them! Preheat your air fryer to 375°F (190°C). Spray the breaded halloumi fries lightly with cooking spray, then cook for 8-12 minutes, flipping halfway through, until golden and crispy.
- Oven-Baked Halloumi Fries: Preheat your oven to 400°F (200°C). Place the breaded halloumi fries on a baking sheet lined with parchment paper, spray lightly with oil, and bake for 15-20 minutes, flipping once, until golden.
Perfect Pairing: How to Serve Your Halloumi Fries
These versatile fries are fantastic on their own, but they truly shine when paired with complementary flavors:
- Dipping Sauces: Our top recommendation is homemade hummus, but they’re also excellent with creamy tzatziki, sweet chili sauce, marinara, a garlic aioli, or even a spicy sriracha mayo.
- As a Side Dish: Serve them alongside grilled meats like our easy oven-baked chicken kabobs, a fresh Mediterranean salad, or roasted vegetables.
- In Salads & Wraps: Add warm halloumi fries to a crisp green salad for a satisfying crunch, or tuck them into a pita or wrap with fresh veggies and a dollop of yogurt sauce.
- Appetizer Platter: Arrange them on a platter with olives, feta, cherry tomatoes, and various dips for a vibrant and delicious spread.
Storage and Reheating Tips
Halloumi fries are best enjoyed immediately after frying when they are at their peak crispness. However, if you happen to have leftovers, they can be stored in an airtight container in the refrigerator for up to 2-3 days. To reheat and restore some of their original crunch, we recommend using an oven or an air fryer. Preheat your oven to 350°F (175°C) and bake for about 5-7 minutes, or use an air fryer at 350°F (175°C) for 3-5 minutes, until heated through and re-crisped. Avoid reheating them in the microwave, as this will likely make them soggy and lose their appealing texture.
Are Halloumi Fries Keto-Friendly?
Good news for those following a ketogenic diet: halloumi cheese itself is naturally low in carbohydrates, making it a great keto-friendly option. This specific recipe for halloumi fries can also be easily adapted to be fully keto. While traditional breadcrumbs do contain carbs, you can simply swap them for low-carb alternatives. Almond flour, finely ground pork rinds, or a mixture of both seasoned with Za’atar will provide a delicious and crispy coating that keeps the carb count minimal. So, yes, with a simple adjustment to the breading, these savory halloumi fries can absolutely fit into a keto lifestyle, offering a delightful and satisfying snack without compromising your dietary goals.
Where to Buy Halloumi Fries (Beyond Homemade!)
While we strongly advocate for the superior taste and satisfaction of making these homemade halloumi fries yourself, their immense popularity means you can also find them ready-made or frozen in various places, particularly if you’re in the UK where they first rose to fame. The phenomenon of deep-fried halloumi fries was notably popularized in 2014 by Oli Baba’s in Camden, London. If you ever find yourself in the capital, a visit to Oli Baba’s is highly recommended to experience their original creation!
For those looking for convenient options to prepare at home, several supermarkets also offer frozen versions. You can often find ready-to-cook halloumi fries at stores like Aldi, Nando’s (their branded version), and ASDA. These can be a quick alternative when you’re short on time, but nothing beats the fresh, customizable flavor of a homemade batch.
More Delicious Appetizers and Sides
If you’re a fan of tasty snacks and starters, be sure to check out some of our other crowd-pleasing recipes:
- Disco Fries
- Melitzanosalata (Greek Eggplant Dip)
- Sardine Deviled Eggs
- Sardine Rillettes
- Pinwheel Sandwiches
Homemade Halloumi Fries Recipe: Your New Favorite Snack!
With just a few basic ingredients like Greek halloumi cheese, fragrant Za’atar, crispy breadcrumbs, and egg, you can create these utterly delicious homemade halloumi fries in minutes. They are the perfect combination of salty, savory, and incredibly satisfying, making them an ideal appetizer or snack for any occasion. Are you ready to dive into the world of crispy, cheesy goodness? Give this recipe a try and let us know what you think by leaving a review below!
If you love this recipe, please give it 5 stars! ⭐️⭐️⭐️⭐️⭐️
Pin for later!
Halloumi Fries
5 Stars 4 Stars 3 Stars 2 Stars 1 Star
No reviews
Author: A Hedgehog in the Kitchen
Total Time: 7 minutes
Yield: 12 halloumi fries 1x
Description
Experience the joy of perfectly crispy and delightfully cheesy homemade Halloumi fries! These golden-brown sticks boast an irresistible crunch on the outside and a uniquely savory, “squeaky” texture within. They are an incredibly easy and quick appetizer, snack, or side dish that’s guaranteed to be a hit with everyone. Ready in just minutes, these flavorful cheese fries are seasoned with aromatic Za’atar, offering a Mediterranean twist that makes them truly addictive. Get ready to indulge in this simple yet sensational treat!
Ingredients
Scale
- 1/2 lb halloumi cheese (about 225g), cut into 1/2-inch thick sticks
- 1 cup breadcrumbs (Panko breadcrumbs recommended for extra crispiness)
- 3 tbsp za’atar (or your preferred spice blend)
- 2 large eggs, lightly beaten
- 1 cup olive oil (for pan-frying, adjust as needed)
Instructions
- Prepare Halloumi: Carefully cut the halloumi cheese block into fry-shaped rectangles, approximately 1/2-inch thick and 2-3 inches long. Aim for uniform pieces for even cooking.
- Mix Breading: In a shallow dish, combine the Za’atar spice blend with the breadcrumbs. Stir well to ensure the spices are evenly distributed throughout.
- Heat Oil: Pour the olive oil into a small to medium frying pan (around 6″/20cm). You’ll need enough oil to cover the halloumi fries about halfway, allowing them to pan-fry without being fully submerged. Heat the oil over medium heat until it shimmers.
- First Egg Dip: In a separate shallow dish, lightly whisk the two eggs. Dip each halloumi stick into the beaten egg, ensuring it is fully coated, then let any excess egg drip off.
- First Breading: Transfer the egg-dipped halloumi directly into the breadcrumb and Za’atar mixture. Roll the stick to coat completely, gently pressing the breadcrumbs onto all sides.
- Second Egg Dip: For an extra crispy crust, dip the already-breaded halloumi stick back into the beaten egg for a second coating.
- Second Breading: Return the twice-dipped stick to the breadcrumb and Za’atar mixture for a final, generous coating. This double-breading step creates an exceptional crunch.
- Fry Halloumi: Carefully place the breaded halloumi sticks into the hot frying pan. Do not overcrowd the pan; cook in batches if necessary. Fry for approximately 30 seconds on each side, turning gently with tongs, until they are beautifully golden brown and crispy all over. The total frying time per batch should be about 2 minutes.
- Drain and Serve: Once fried, remove the halloumi sticks from the pan and place them on a plate lined with paper towels to absorb any excess oil. Serve immediately while hot for the best flavor and texture.
Notes
We don’t often fry food, but when we do (and it is absolutely worth it for these incredible halloumi fries!), we always make sure to open the windows of our kitchen to ensure our apartment doesn’t smell like oil afterward. This tip is especially important if you’re cooking in a smaller living space to keep your home smelling fresh!
- Prep Time: 5 minutes
- Cook Time: 2 minutes
- Category: Appetizers, Snack, Side Dish
- Cuisine: Greek, Mediterranean, Cypriot
More Halloumi Recipes from Other Bloggers!
If you’ve fallen in love with halloumi through these fries, you’ll be delighted to know there are many other fantastic ways to enjoy this versatile cheese. Explore these delicious recipes from fellow food bloggers:
- Fried Halloumi Cheese Salad Recipe
- Grilled Halloumi Cheese Skewers
First published September 9, 2018. Last updated March 16, 2021 with more information, additional tips, and better readability. This expanded guide provides even more insights to help you master the art of homemade halloumi fries!
